| You are not Logged In! |
Difference between revisions of "Public:KiCad/BOM"
| Line 1: | Line 1: | ||
| − | {{WIP| | + | {{WIP|This page is out of date|Luke}} |
{{RemarksBox | {{RemarksBox | ||
Latest revision as of 21:52, 3 November 2023
| This Page is a Work In Progress | |
| This page is out of date - Luke | |
| Note | |
| This page is out of date see Adding_a_BOM_to_PartsBox | |
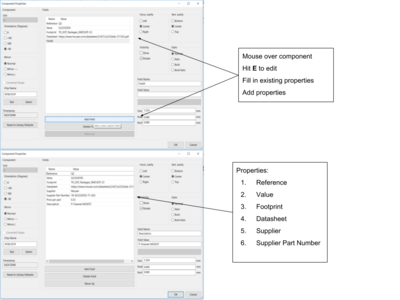
Set Up Your Schematic Properly
See Schematic Conventions or more specifically Schematic Conventions: Part_Information: required part information on that page for details.
Built-In Plugins
KiCad now includes its own plugins in program location\KiCad\bin\scripting\plugins. This section is not a how-to, but a list of considerations for standardizing schematic component fields and editing the included BOM generator(s). When we have an end-to-end solution completed, please write directions. Mostly this is discussing how to edit files to get the BOMs we want. The included files in KiCad have a lot of good comments to read through, and that's where most of this information comes from.
Netlist reader
file kicad_netlist_reader.py
This file is included in the BOM generator scripts. One of the helpful things here is you can have it automatically exclude things from all BOMs. We should edit this to exclude things that say DNP.
Someone else with better python skills will probably enjoy figuring out all the cool things we can edit in this script to make things easier.
BOM to CSV
You can edit the .py files if you want. Seems like a pain. I'd just use the Interactive HTML BOM below.
OpenSource Plugins
Interactive HTML BOM
Click on any of the links below for infos. In summary this is a plugin for KiCad which will allow you to view which parts are where on the PCB you're assembling, completely separate from KiCad. Extra nifty points if you set up a small tablet next to you while soldering and use the files this plugin generates. It is also a good way to view BOM information in general, although be aware that the check mark status (for the Sourced and Placed columns) are saved in browser cache and not in the actual file. Therefore you will just have to use that for your own reference. You can alternately export (copy icon, paste into Excel or similar) the state of the BOM table and that does include the check marks.
Recommendations
Windows 10 Install
Simply download the repo as a zip file, extract it, make sure the top level folder doesn't just have one folder inside it (an intermediate folder). Move this folder as instructed in the creator's installation instructions, don't try messing with links/shortcuts unless you really want to. It's simple enough to download a more recent version and replace the old folder when the plugin is updated. Then open/restart KiCad and check for a neon green button called "iBOM" on the toolbar in Pcbnew. You shouldn't have to do anything else to install it. Nifty! Then you can explore the functions of the plugin.
Using it Since we Schematic Conventions: Part Information to KiCad components during the schematic process, they will not show up if you simply click "iBOM" and then (export? generate?). To tell iBOM about the custom fields, you should generate a netlist as instructed in the instructions.
Links
Creator's Installation Instructions
Comments
The installation instructions for Windows do indeed work. Note that the "scripting console" is accessed by opening Pcbnew and going to Tools -> Scripting Console. Below are some minor clarifications which may make the setup instructions easier to read.
Windows 10 Installation
- Download the ZIP folder
- Extract all
- Locate/create the folder as instructed on the page
- Move the actual root folder of the repo to the folder you just found/created (make sure there isn't an extra level that's just a folder)
- Restart KiCad if you had it open
- Open Pcbnew
- There should now be a button on the toolbar next to the Scripting Console logo. It says "iBOM"
OS X installation
(coming soon)
Linux Installation
(coming soon)
From Missouri S&T
Procedure:
- For each component, perform the following in Eeschema
- Go to the following link: Kicad BOM Generator
- Clone/Download it onto your computer
- Save it somewhere you’ll remember
- Follow instructions on page under Usage (repeated below)
- Open Eeschema for your board
- Click Tools > Generate Bill of Materials
- Click Add Plugin
- Browse to folder you saved, select kicad_bom_generator.py
- Click Open
- Type meaningful name
- To generate your BOM, just select the name that you typed in where it is listed under "Plugins" and then click "Generate"
- By default, this will save an excel sheet in the same folder as your project
Instructions for Parser to be expanded upon later
Credit to Peter Leung for the content pre- 10-07-18
