| You are not Logged In! |
Public:MCUXpresso
| Use version 10.1.X | |
| ISC Uses MCUXpresso version 10.1. Do install versions 10.2 or newer. | |
About
MCUXpresso is an IDE from NXP who makes the family of chips we use on ISC (or at least they bought the company that did). We use MCUXpresso to build, flash, and debug all of the code on the solar car. You can use any IDE for writing code, however you must use MCUXpresso to compile, flash, and debug all code on target.
Setting Up MCUXpresso
Note: ISC has officially only ever supported windows. We are working to make our software more cross platform but instructions for non-Windows may still be lacking. Please improve them!
Windows 10 & Mac OS X
- Download the MCUXpresso IDE from the NXP Website.
- Direct Download link (for Windows) to skip creating an account
- Download link for mac
- Download link for linux
- Register for an NXP account
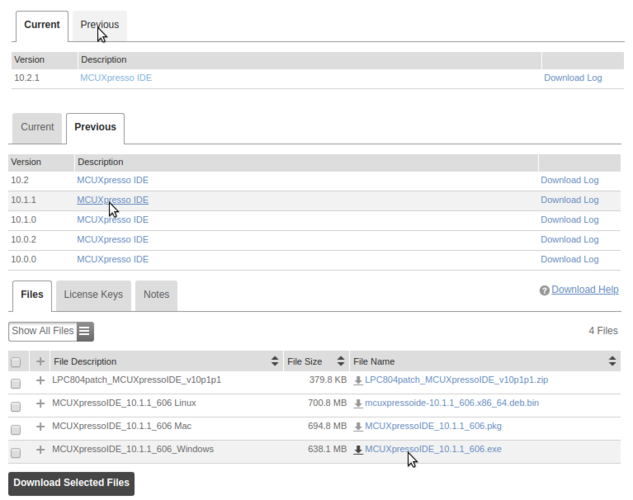
- Download MCUXpresso 10.1.x. ***10.2+ have some compatibility issues with our systems.***
- Find it on the "Previous" Tab
- Agree to the MCUXpresso terms*.
- Download the version for your OS.
- Direct Download link (for Windows) to skip creating an account
- Install MCUXpresso including Debug Drivers
- Also Install all device drivers when prompted (depending on your device settings you may not receive these, may only receive one for them all, or will receive a bunch)
- At this point you will need to have github software repos set-up on your computer to move forward with the set-up process. If you are working on Brizo code you will need b-fw, the setup information can be found at the bottom of the github b-fw wiki page. Once you have completed this, continue these instructions.
- Create your workspaces in MCUXpresso (File -> Switch Workspace -> Other...) Each repository will need its own workspace!
- Argo-fw: make a single workspace for all Argo projects
- B-fw: make a single workspace for all Brizo projects, simply create a folder somewhere on your computer (but not in the repo!) and select this folder when opening MCUExpresso
- Where should I put my workspaces files? (they are configuration files that are stored on your computer). Common advice varies but do not put them in the repo. You can put them in another folder at the same level as the repo if you like. Just know where they are, you might need to know later.
- For b-fw only: To enable you complete the next step there is one time set-up for the static libraries (common and mbed).
- In your file explorer navigate to common and extract the the project files .zip archive
- In this there are
.projectand.cprojectfiles, move them to the top level common folder (in other words, they should be in b-fw/common)- These files may be hidden, on Mac to show hidden files in finder press
CMD + Shift + DotTo toggle hidden files - On Windows you can follow these instructions to show hidden files
- If the command line, hidden files can be shown us
ls -a
- These files may be hidden, on Mac to show hidden files in finder press
- Delete the (now empty) extracted project files folder
- Do the same for mbed - note that the archive is called z_project_files.
- With MCUXpresso open, import the files into your workspace:
- Go to File > Import
- Select General > Existing Projects into Workspace
- Click "Browse" next to "Select root directory"
- Select the base folder for the git repository you are setting up the workspace for. (b-fw or ARGO-FW)
- Select the checkboxes for the projects you want to import to this workspace
- On ARGO -FW you will want
mbedcommonand all of the projects you need - On b-fw you will want
mbedcommonmbed15x9_skeletonplus any projects you need
- On ARGO -FW you will want
- At this point you are ready to work on and edit existing projects. More info on Building and Debugging Code can be found on its wiki page. Continue below for notes and help if you run into some rare known issue.

Linux
Note: these instructions are probably inaccurate. If you are using Linux please use version 10.1.x and consult John Han so we can update these directions with a tested procedure.
These steps were performed with Ubuntu 20.04 LTS.
- Download MCUXpresso 10.1.x
- Navigate to Downloads and run the installer
chmod +x <name_of_download> sudo ./<name_of_download>cd ~/Downloads
- When prompted, set an appropriate directory to use as your workspace. As mentioned above, this should be separate from where the code is stored.
- In a directory other than your workspace directory, clone the firmware repository of your choice
- git clone --recursive https://github.com/IlliniSolarCar/b-fw.git
- For more information, see the wiki page about git
- If you are working on b-fw, unzip the .project and .cproject files within mbed and common
- cd common unzip project_files.zip mv project_files/{.cproject,.project} . rm -r project_files/ cd ../mbed unzip z_project_files.zip
- Import the firmware files into your workspace
- File > Import > General > Existing Projects into Workspace
- Select the git repository as your root directory
Building and Debugging
Once you've completed the steps above you should be ready to build/debug your code and put it onto the MCU. For instructions on that see: Building and Debugging Code
Rare Problems
If you have a Lenovo non-ThinkPad device, or maybe something else weird running Windows 10, you might run into the debuggers not working even if you've set up everything correctly. The error text when trying to debug was a popup saying Socket exception: connection reset or something similar, and the details were a whole list of things including Java code locations. This problem is probably not with the drivers. The easiest fix was to install MCUXpresso 10.1.0 instead of 10.1.1. It may work with other earlier versions as well but hasn't been tested yet. Also make sure to restart your computer after attempting any changes to MCUXpresso versions and driver installs.
Configurations
If you follow the set-up instructions above you will have everything configured as needed. This section is about why/how those configurations came to be
Note: this is written based on my understanding and may not be complete or 100% accurate. If anyone has more interest in diving deeper into the configuration of our tool chain please do and update this!
Several things have to be configured in the IDE for everything to work correctly. This will briefly discuss where configurations are stored/set. For the most part everything that is relevant can be found in propertied -> C/C++ Build. In these properties all of the different tabs that have a configuration listed at the top are changing settings in that configuration. Importantly this includes dialects, linker scripts, and optimizations. Notably, it does not include the settings on the MCU settings page! That is stored in the workspace settings. If you are using a different MCU regularly you might want separate workspaces for that - if this becomes a team wide regular thing it probably should become a standard set-up.
Linker Scripts:
The linker scripts include all of the info for memory mapping. This info comes from the MCU datasheet and MCUs with the same memory configuration (such as LPC1519 & LPC1549) can use the same one. Generally these files should not be changed.
The Appendix and notes section has been moved to the Building and Debugging Code page since it most had to do with issues related to debugging. -Jonathan (Sep 2019)
Additional Resources
MCUXpresso Product Overview (with documentation)
Doxygen - for documenting your code
Credit:
This set-up guide is adapted from Devan Lai's (of CalSol) LPCXpresso set up guide which can be found here. Our set-up is based on CalSol's the development of Zephyr